
Get Tech Tips
Subscribe to get free tech tips.
Estimating Made Easy with Unity Build

Many of you may already know that our HVAC company, Kalos Services, is also a GC. We do a lot of construction projects with HVAC, plumbing, and electrical scopes of work. Estimating is a crucial part of winning those projects, and those of you who work on HVAC for new construction probably already have an idea of its challenges. It can be difficult to account for all of the materials and labor, even more so if you’re estimating for multiple trades.
Over the past two years, we’ve developed our own estimating department at Kalos. As we’ve done that, our new estimating director (and electrician by trade), Phil Barr, has developed software to make the estimating process as easy and accurate as possible, even for those new to estimating. This software, called Unity Build Estimation (https://unitybuildestimation.com/), allows you to upload project drawings, create assemblies (with prices), and manage on-screen takeoffs for all trades, including HVAC.
Phil has experienced life as a tradesman, completed several takeoffs, and trained the estimating team. He designed Unity Build to alleviate the pain points he had noticed for tradespeople and estimators, both new and seasoned. We’re going to look at how Unity Build works and can help you streamline estimates for HVAC projects.
What is Unity Build Estimation?
Unity Build is a cloud-based estimating software that lets you create on-screen takeoffs for various construction and MEP projects. Like Google Docs and other cloud-based services, Unity Build allows teams to collaborate in real-time OR asynchronously.
Unity Build allows you to upload plan documents and visualize how materials will be used and where they will go during the project. A lot of us in the trades are visual and hands-on learners, so Unity Build lets you physically see how your assemblies will look on the project plans. Unity Build also allows you to divide portions of a takeoff into breakouts to help keep things organized.
Phil designed Unity Build with user friendliness in mind. Most of the similar items are grouped together in the same menu so that you can easily navigate the software and not feel overwhelmed. There are also labels and templates in the forms to help you organize and document relevant details about your projects, which also helps with communication across teams and with clients.
One of Unity Build’s more unique features is its AI integration. An AI chat assistant can answer common questions, fetch prices, generate reports, and more within seconds, potentially cutting hours of research (and reducing the number of open tabs in your browser).
Getting Started
When you first sign in to Unity Build, you can view all of your projects. This main page also has some high-level information about those projects in clear view, including their addresses, descriptions, and start and end dates. You can easily keep track of all past, present, and future projects.
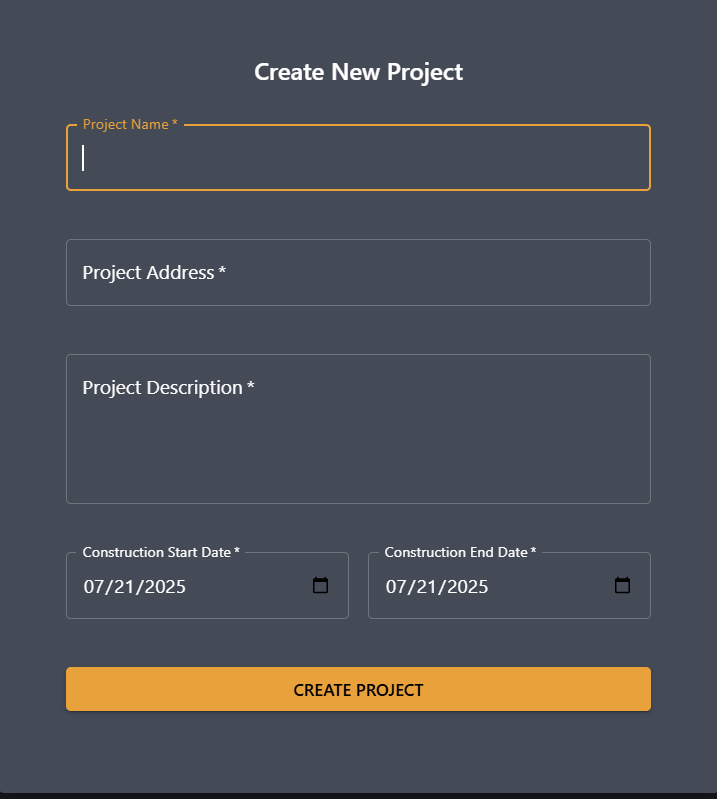
To add a project, you simply click the orange Create Project button at the top and fill out the pop-up form with that information.
Each project contains one or more estimates. You can add or edit estimates by clicking on their respective project. There is also a search bar at the top that you can use to find projects by name.
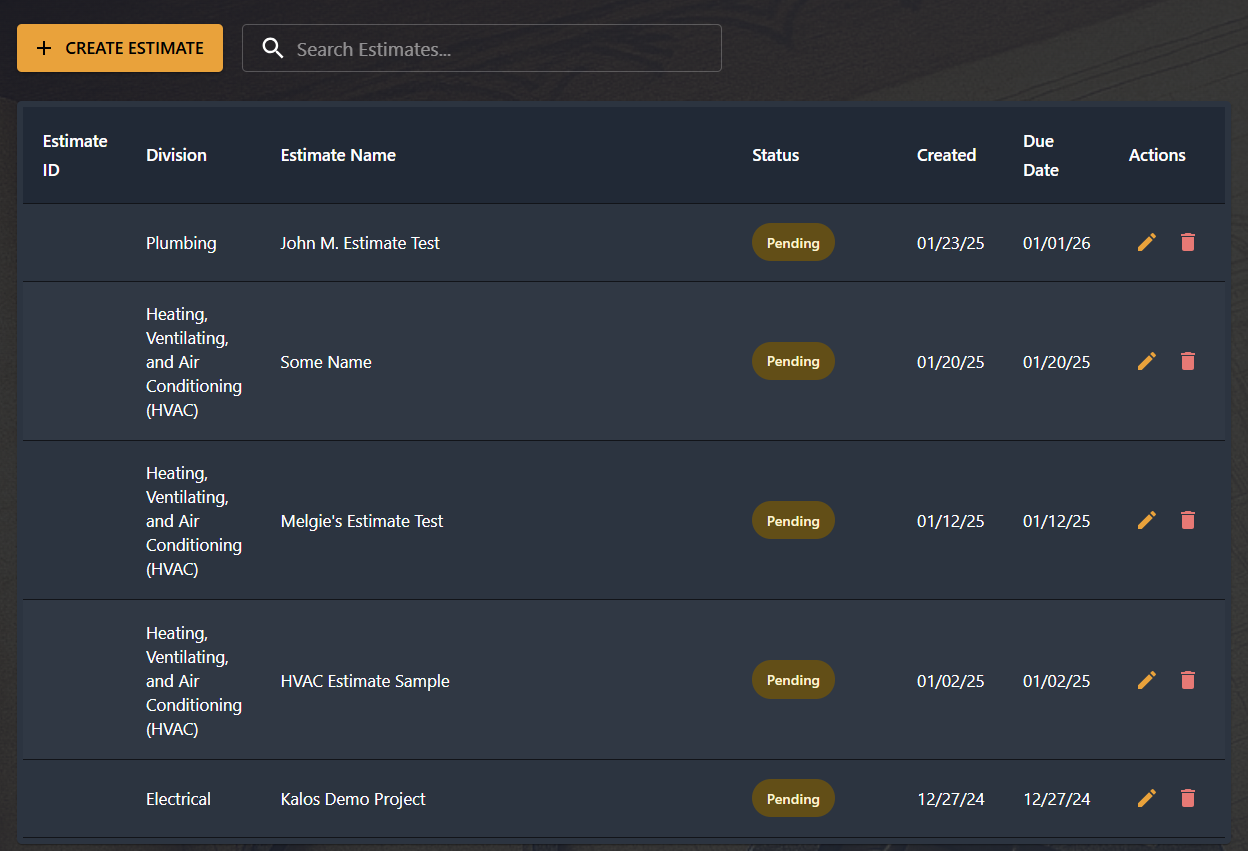
When you click on a project, you will be able to view all existing estimates for that project, along with their current statuses. In many cases, each trade will have a different estimate; you can see which trade you’re looking at in the Division column. Clicking on one of these estimates will open up the plans and any progress that has already been made.
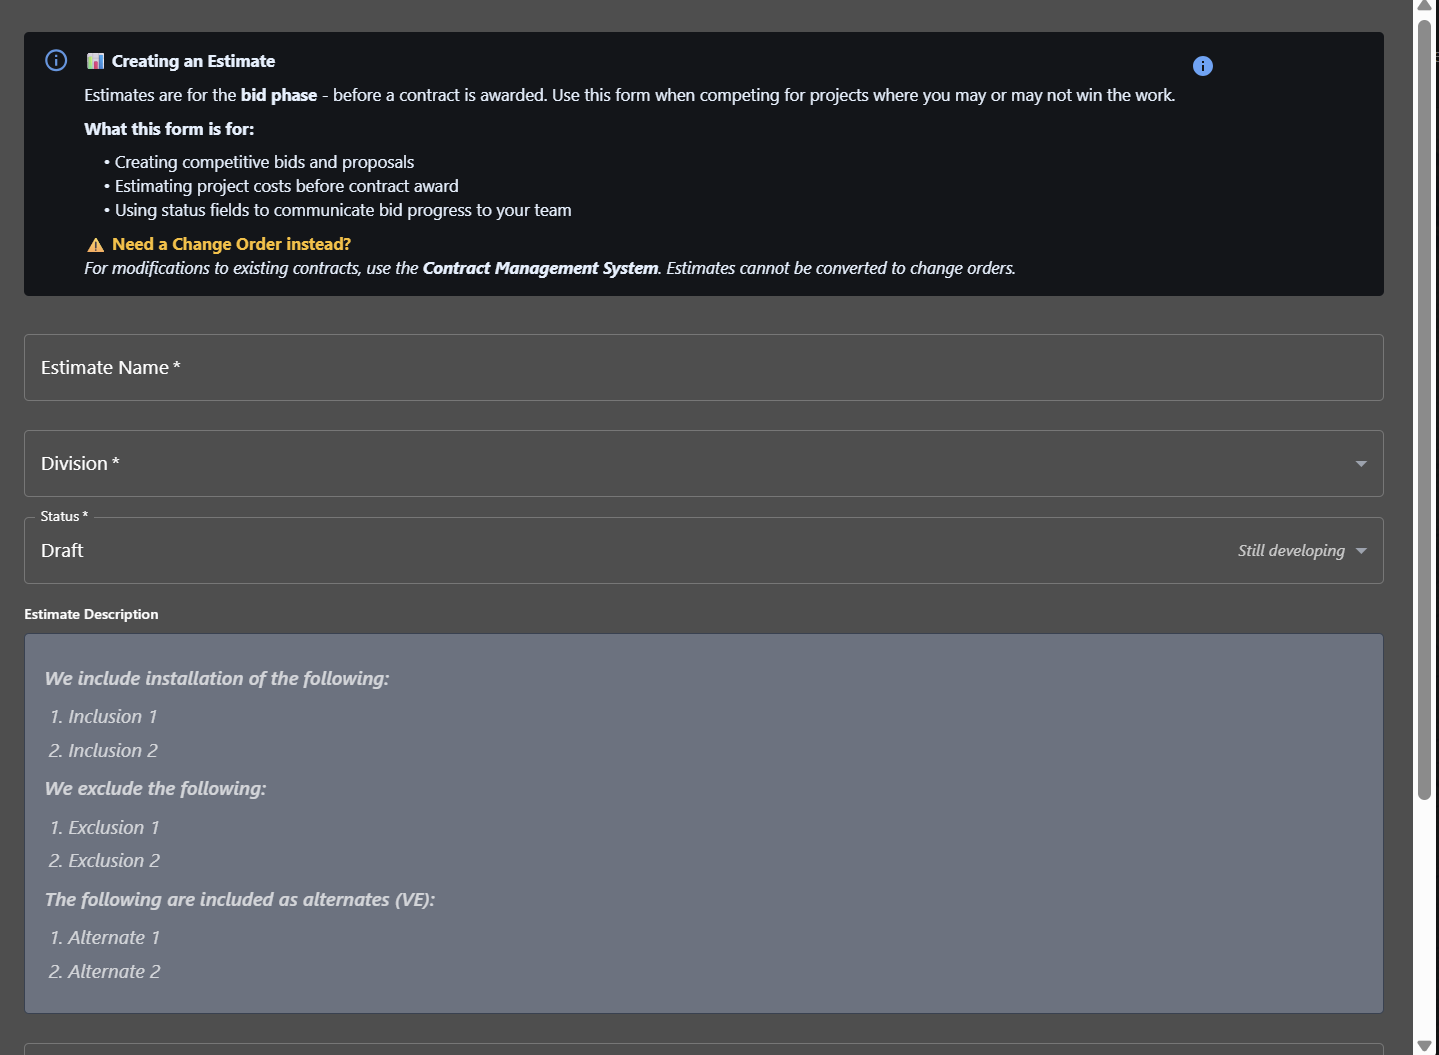
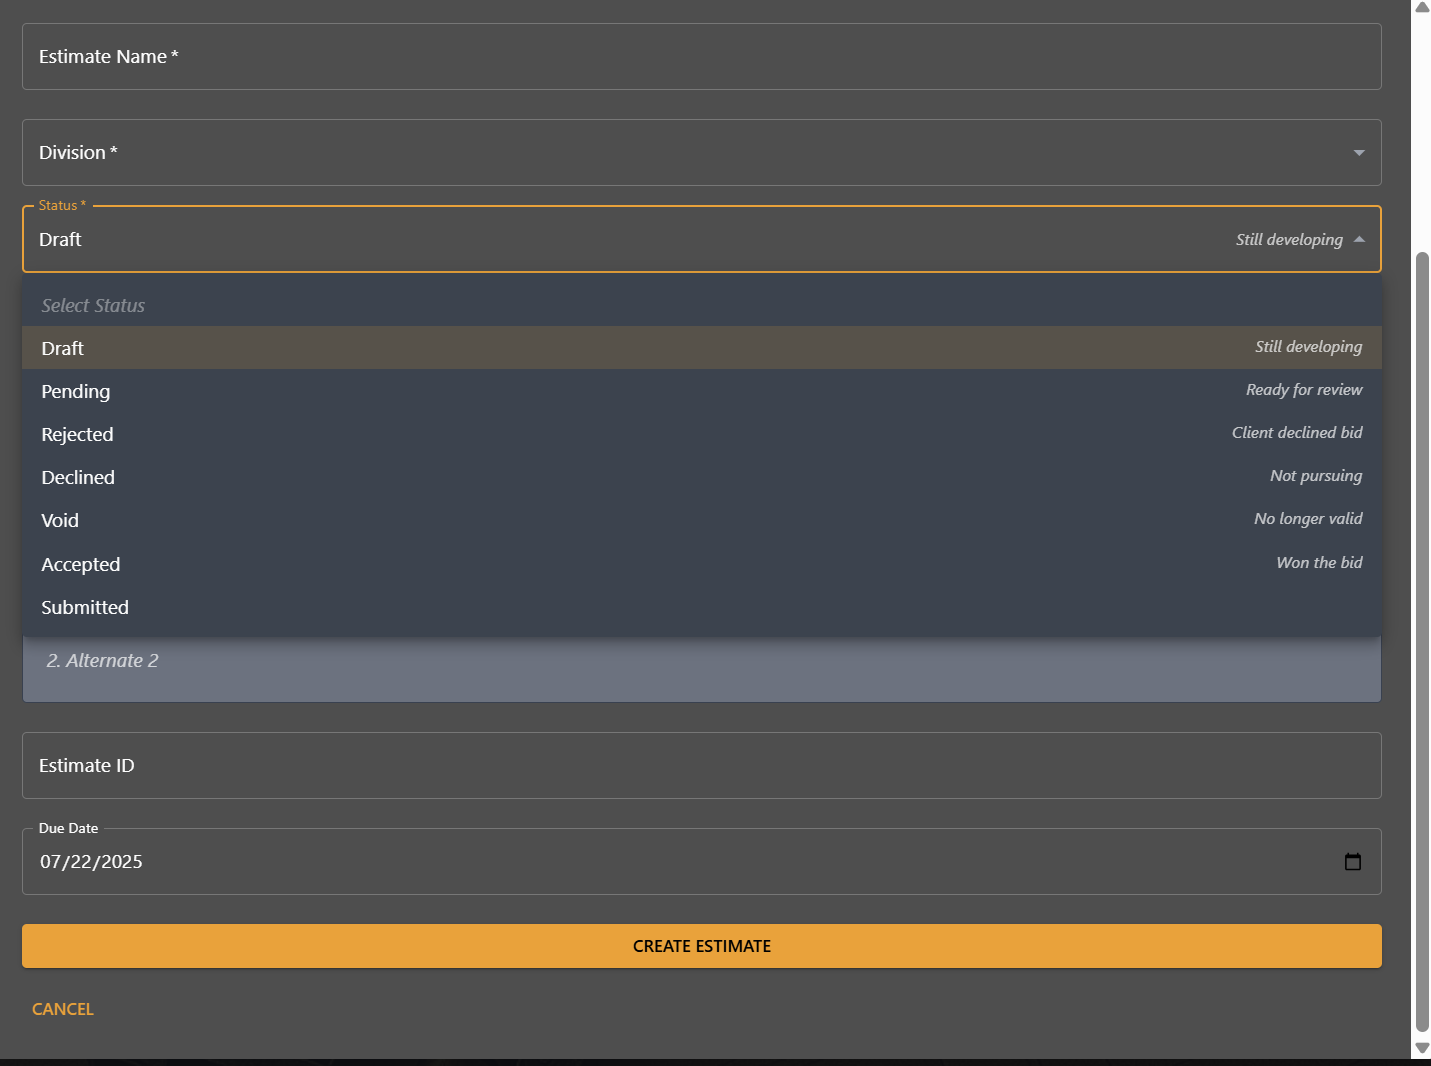
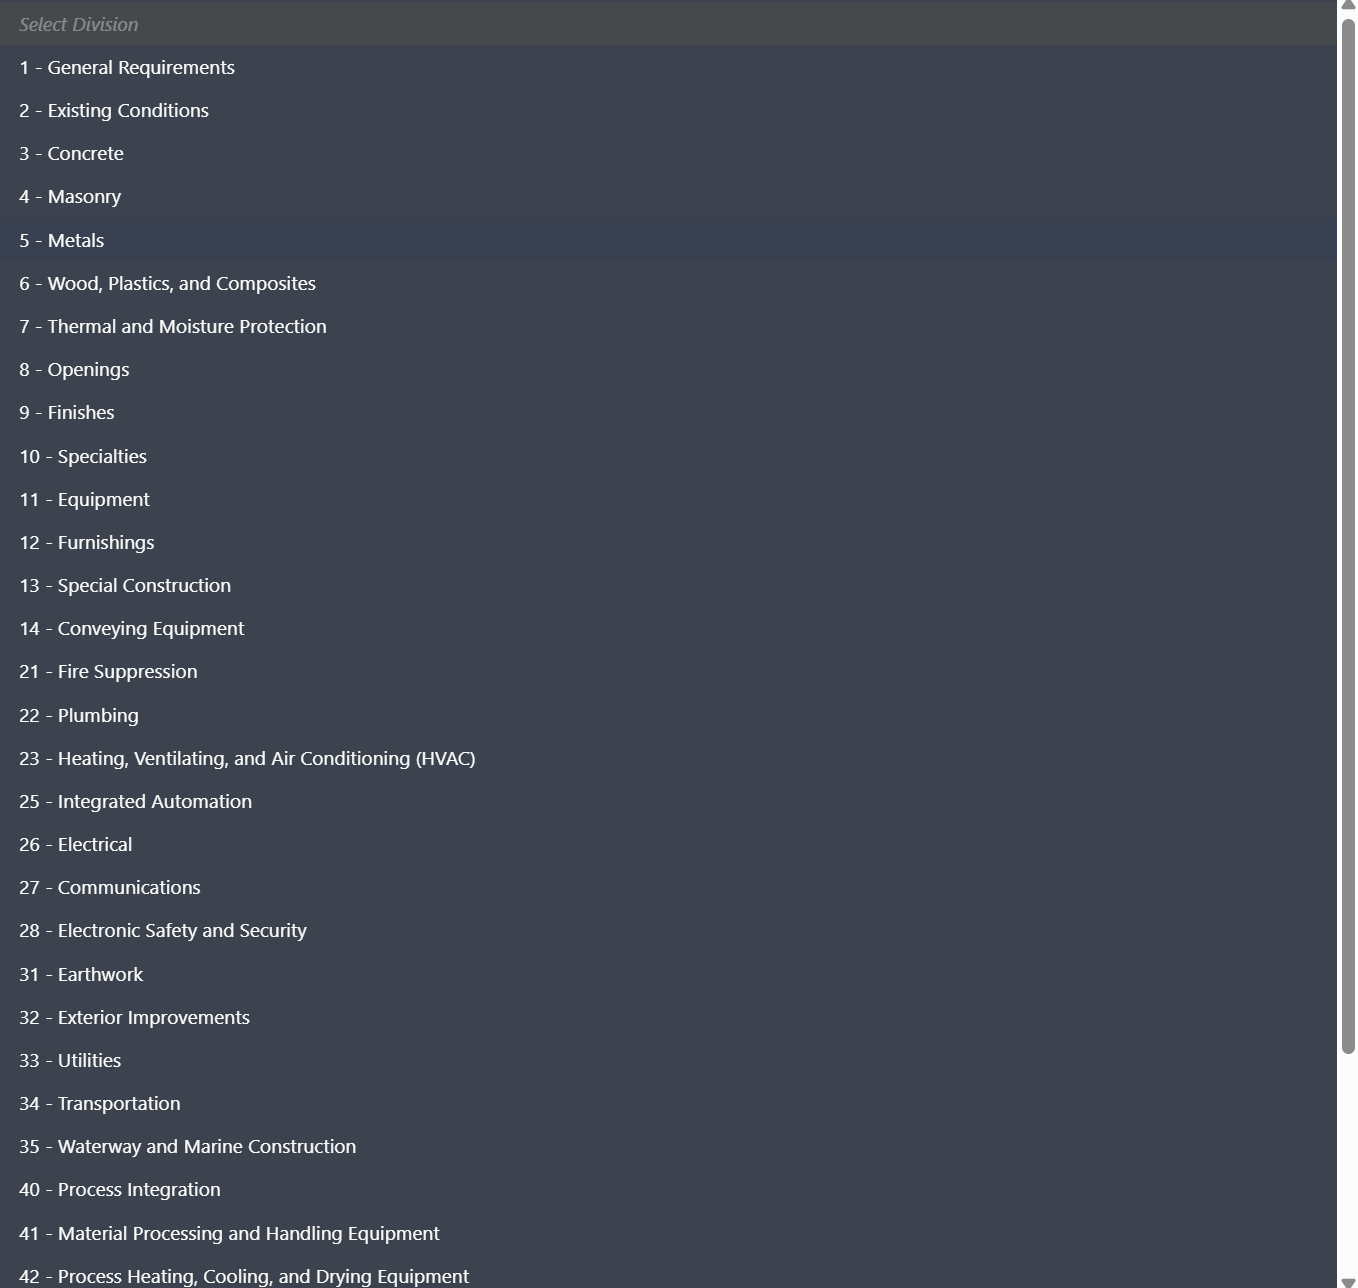
To add a new estimate, simply click the orange Create Estimate button at the top left and enter some basic information about it, including the name, MasterFormat division (HVAC is 23), its status, dates, and descriptors. The pop-up has a brief guide, templates, and labels to help you include all the important details in your project and avoid confusion.
Once you have created a new estimate, Unity Build will take you straight to the portion of the software that lets you perform on-screen takeoffs.
On-Screen Takeoffs
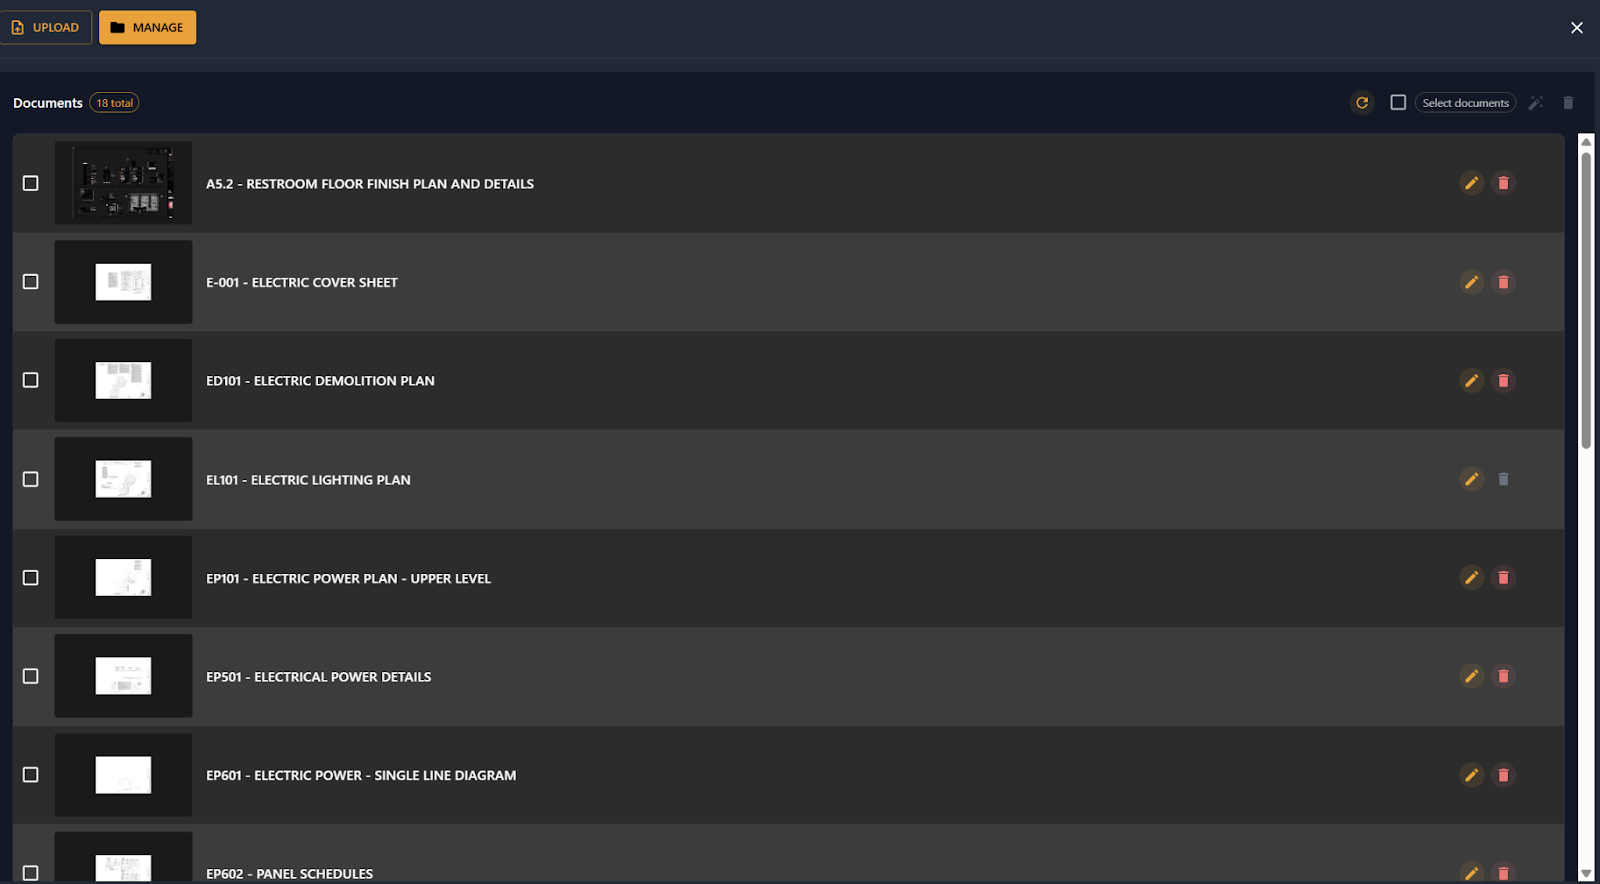
When you first start an estimate, no plans will be displayed on the screen. Unity Build has a document manager where you can upload and organize your plans. When you click the Document button at the top left, you’ll open a pop-up that shows all the documents you’ve uploaded and lets you upload new ones or edit or delete existing ones. At this point, Unity Build only accepts PDF uploads. When you have at least one set of plans, click on the plan you want to display on the screen for your takeoff.
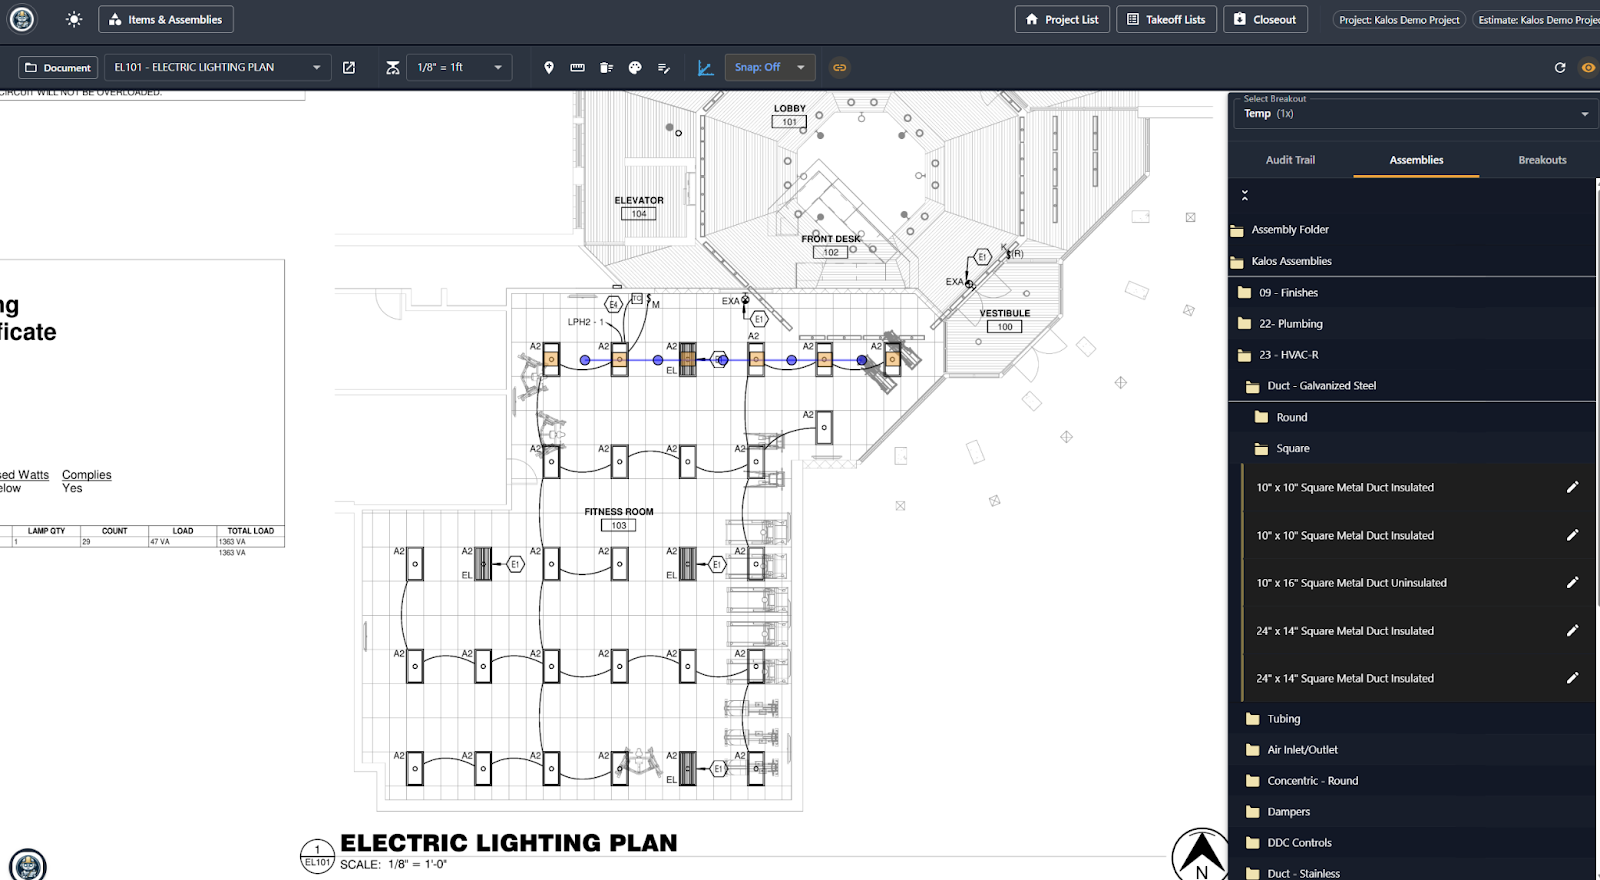
Unity Build generates reports by counting the assemblies you place on the plans. Assemblies are collections of parts that you can configure by saving collections of items and their pricing information. To view existing assemblies, click Assemblies on the takeoff palette on the right-hand side. You can click on an assembly and begin creating a takeoff for it. The top left corner of the screen will tell you which assembly you’re creating a takeoff for, and the assemblies will show up as colored points with lines connecting them when you place them.
As you draw the assemblies on-screen, Unity Build gives you some tools to help with assembly placement on the plans. For example, you could use the angle snap feature to make the angles snap to 15° increments for straighter, more consistent lines between assemblies. You can also add annotations to convey important information to team members who may also be involved in the takeoff.
If you need to make widespread changes, click and drag to select several assemblies at once and make sweeping changes, such as copying an arrangement, deleting several assemblies, or specifying drops for lighting fixtures.
Adding Materials and Creating Assemblies
You can create an assembly by clicking on the Items & Assemblies button at the top left. (It will take you to the same editor as the one accessed by clicking on the pencil icon beside an assembly on the right-hand takeoff palette.)
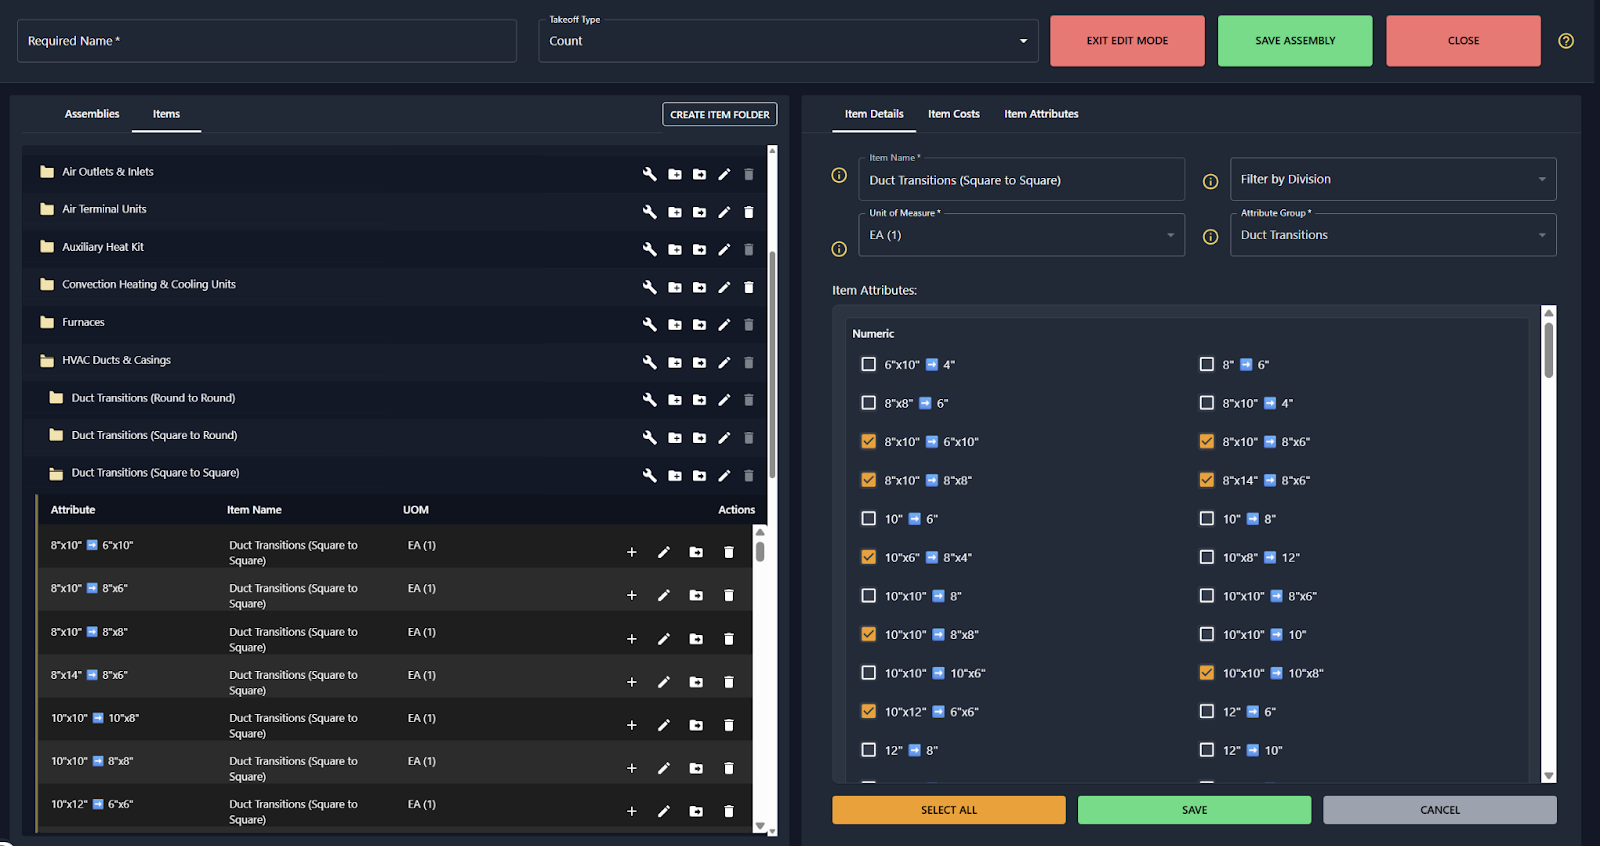
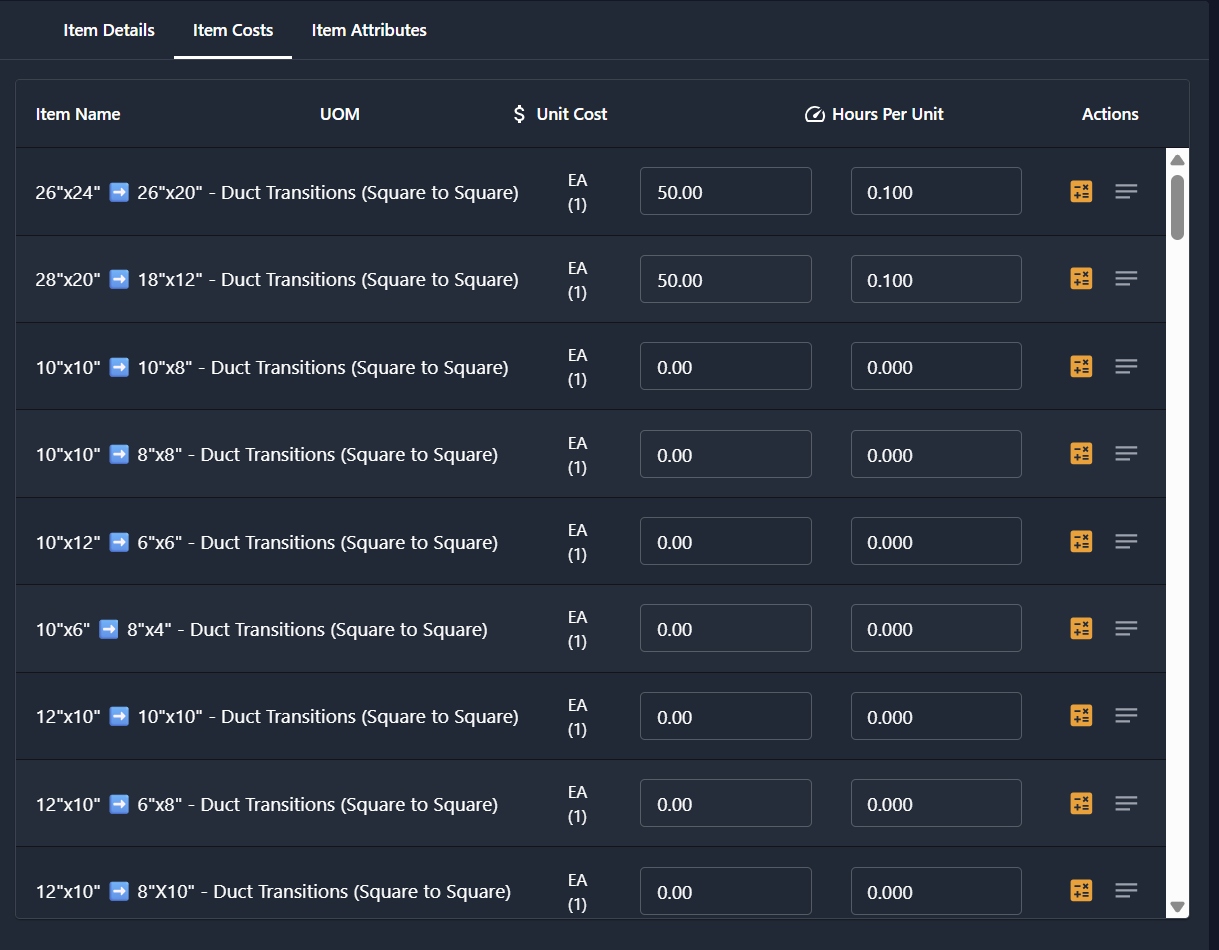
You can add materials to the software and include their prices; these are called Items. The software will add these items up as you include them in assemblies (which are then included in the plans). To add an item, click the orange button at the top labeled Enter Item Mode. You will see a form that requires you to fill out some basic information and pricing details (you can specify part AND labor estimates).
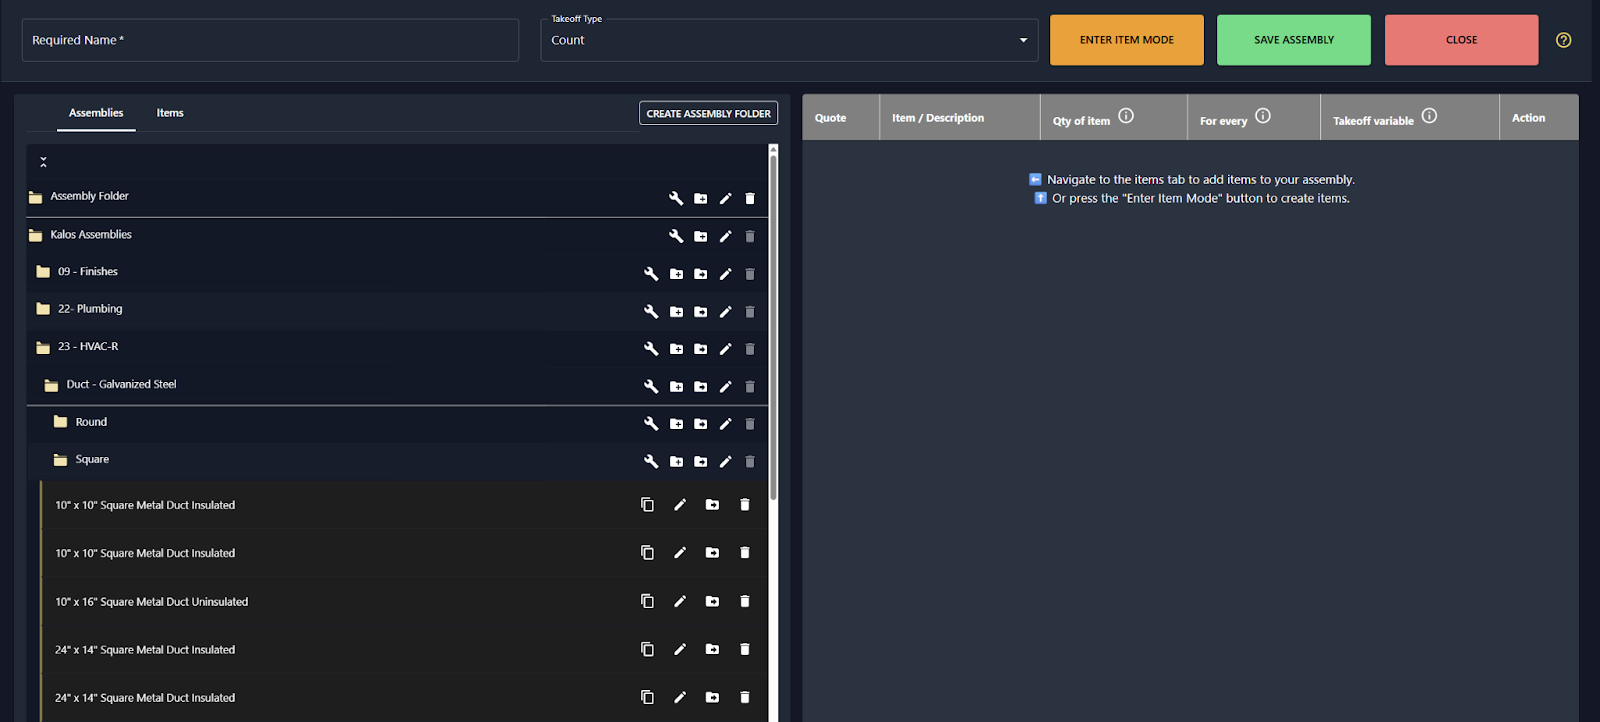
Using those parts, you can create assemblies in Assembly Mode, which is the default mode when you open the item and assembly editor. You simply click on the items you want to add to your assembly and click Save Assembly to create one that you can drag and drop into your plans.
Here is an example of an assembly for a 10” x 10” square metal duct (insulated):
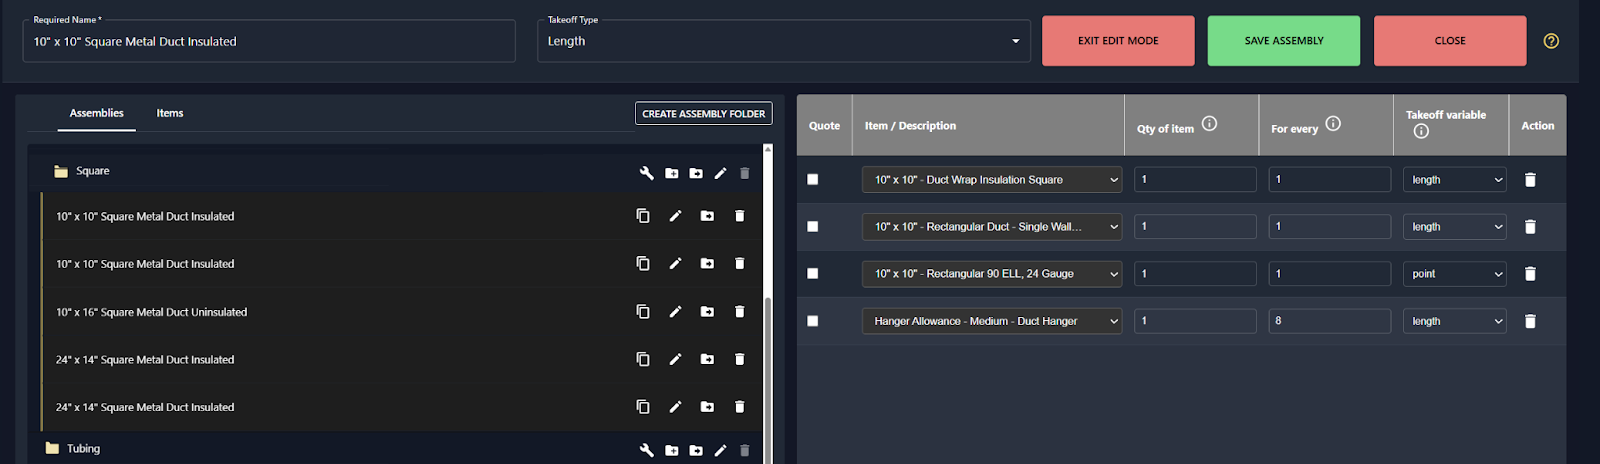
Once an assembly is saved, it will show up in the Assemblies tab of the right-side takeoff palette. You simply click the assembly you want to place and drop it in the plans to begin your takeoff!
Quick and Easy Assistance with AI
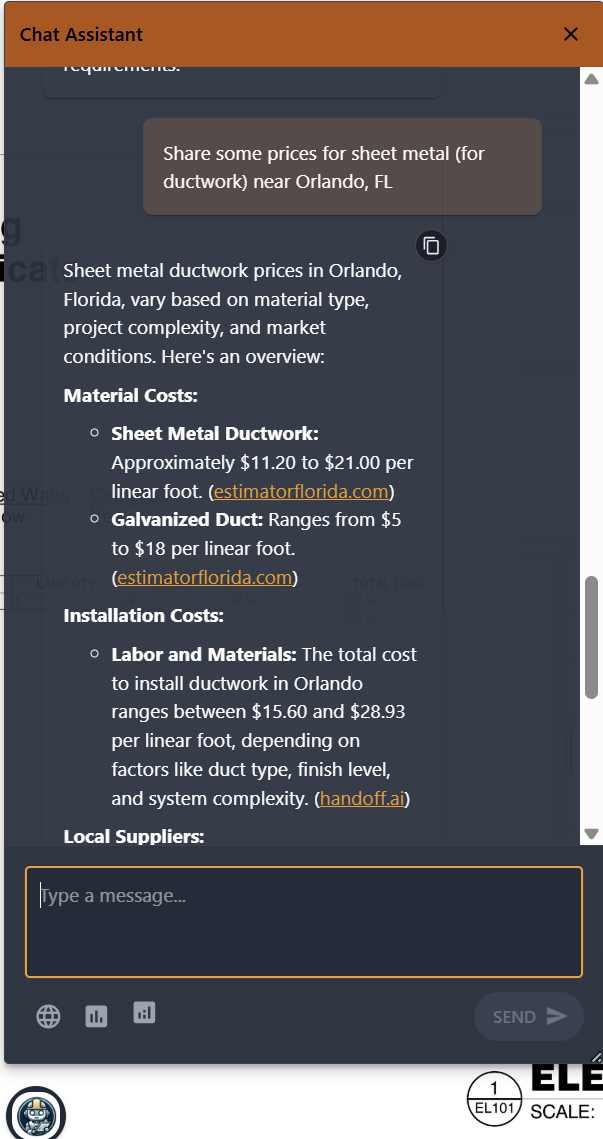
Estimating requires a lot of research, especially for pricing and to obtain clarity on the scope of work if you’re not entirely familiar with a trade. We recognized this common pain point and decided to incorporate an AI chat assistant to answer questions and point you to resources. You don’t have to open up ChatGPT or Gemini; you can get simple answers and links to verify those inside the software. You can click on the small robot icon at the bottom left to open the chat assistant at any time.
Whenever you request pricing for a material, the chat assistant provides links to sources so that you can verify its accuracy and copy and paste the pricing from local suppliers. You could also ask the chat assistant to define an unfamiliar or confusing term. For example, an electrician might not know what inches of water column means; they could ask the chat assistant, which would tell them what they need to know for an HVAC estimate.
You could also copy the chat assistant’s responses and paste them into a document if you need to store information or form reports based on the chat assistant’s reply. (You can even ask the chat assistant to help you generate those reports!)
Thorough Closeouts
Before finishing a takeoff, you can click the Closeout button at the top right to get a bird’s-eye view of all elements in the takeoff, including items and assemblies that are missing prices or labor hours.
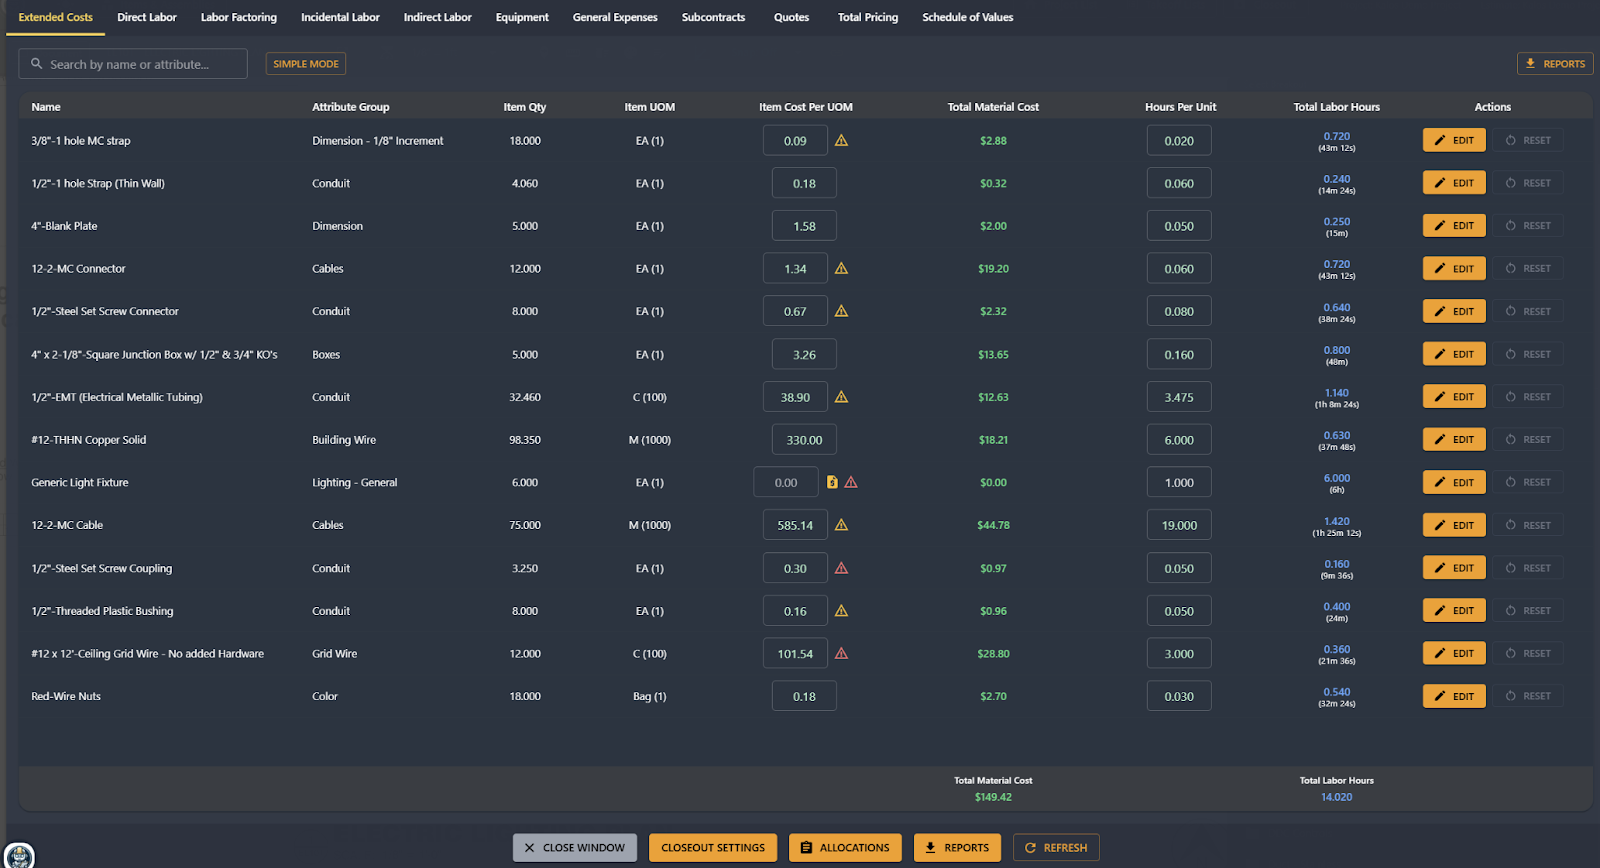
At this point, you can also add up charges for equipment, general expenses (e.g., portable restrooms, storage, etc.), labor (direct, indirect, and incidental), taxes, overhead, and subcontractors.
You can then generate reports of thorough estimates that account for all aspects of a project by clicking Reports. However, you can also ask the AI chat assistant to generate a report for you as long as you describe what you want in the prompt.
How to Get Unity Build and What to Expect Next
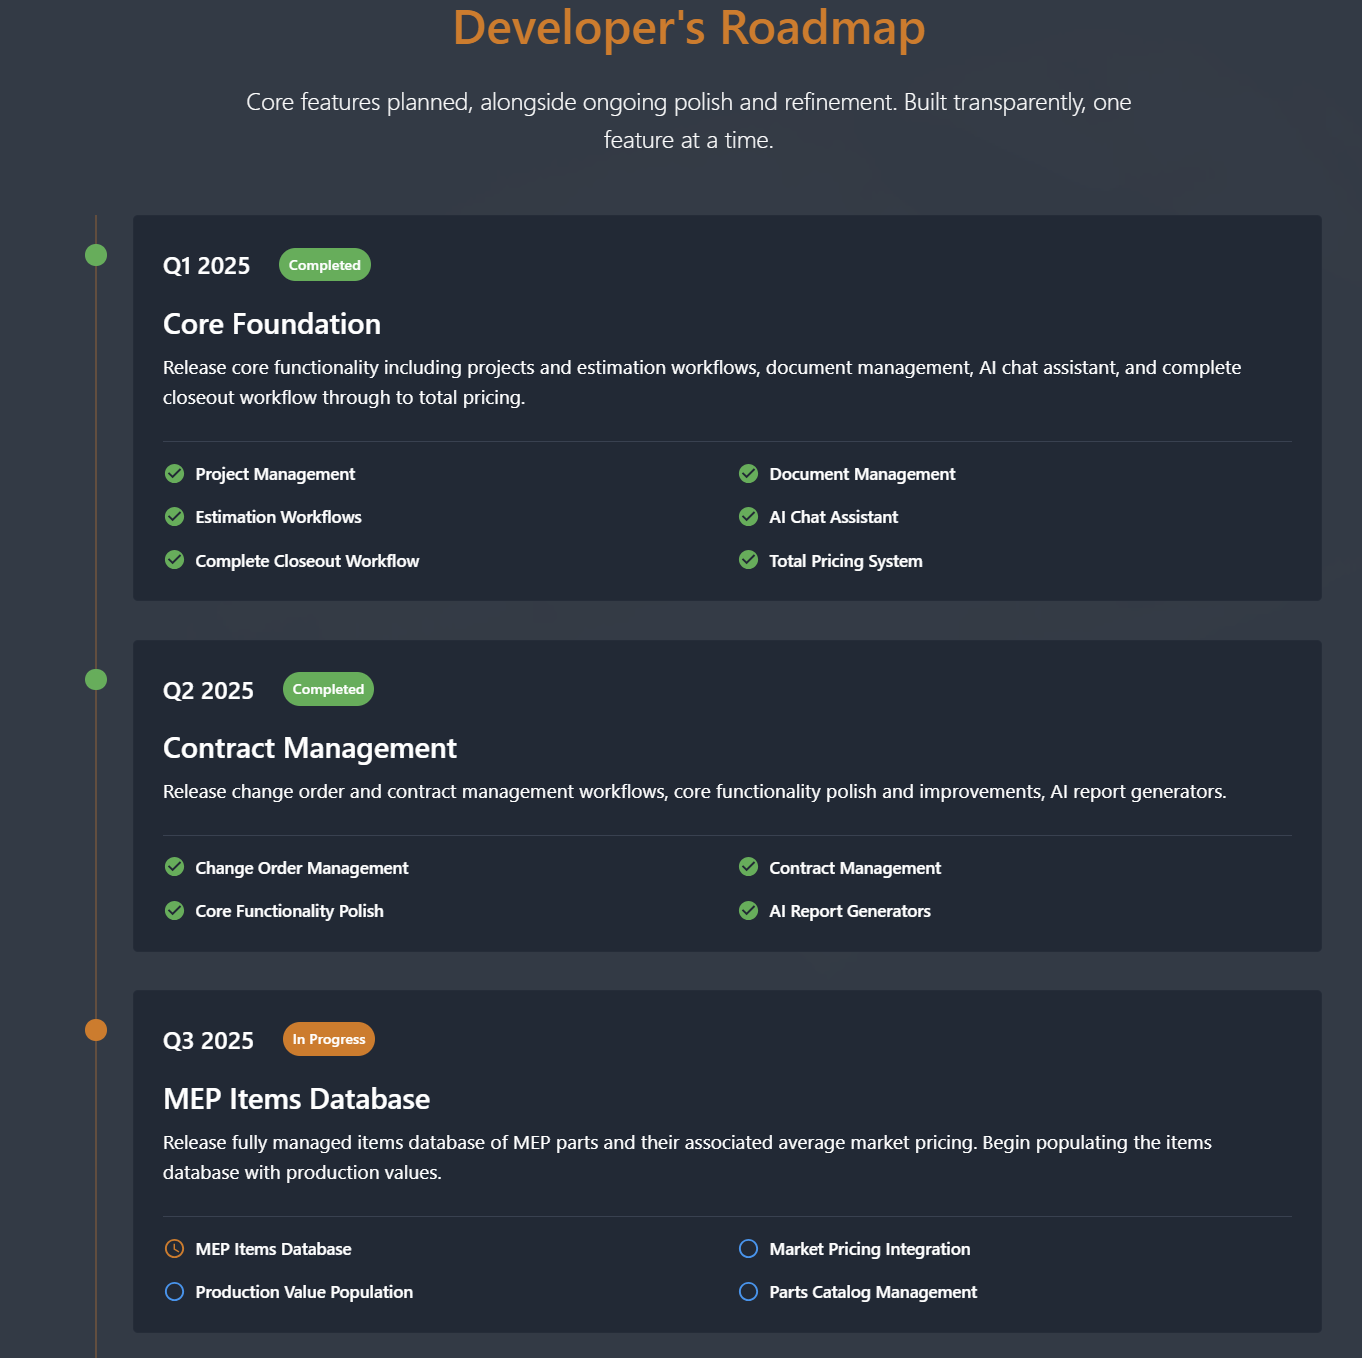
Unity Build was developed by tradespeople for tradespeople, and Phil is constantly taking feedback from users to improve it. While the basic functionality is in place and will stay the same, development and bug troubleshooting are ongoing, especially since our estimating team at Kalos uses it daily. Development is being tracked on the Developer’s Roadmap.
Unity Build also has articles (with videos and podcasts coming soon) about the software and general estimation principles in its Resources and Knowledge Center. This resource library is currently expanding. Phil also has a YouTube channel with tutorials, which you can find HERE.
A Unity Build subscription currently costs $125 per month (per seat). There is a 14-day free trial on the website, which allows you to see if it’s a good fit for your business without a price commitment.
Phil has some exciting new features coming, including a comprehensive database for MEP items and pricing, so keep an eye out for those changes and new developments. Unity Build has been an exciting project to watch, and we hope you (or a friend in the trades) can make faster and better estimates. If you have any questions about Unity Build Estimation or encounter any bugs that you want to bring to our attention, you can send them to help@unitybuildestimation.com.
 Related Tech Tips


Comments
To leave a comment, you need to log in.
Log In